
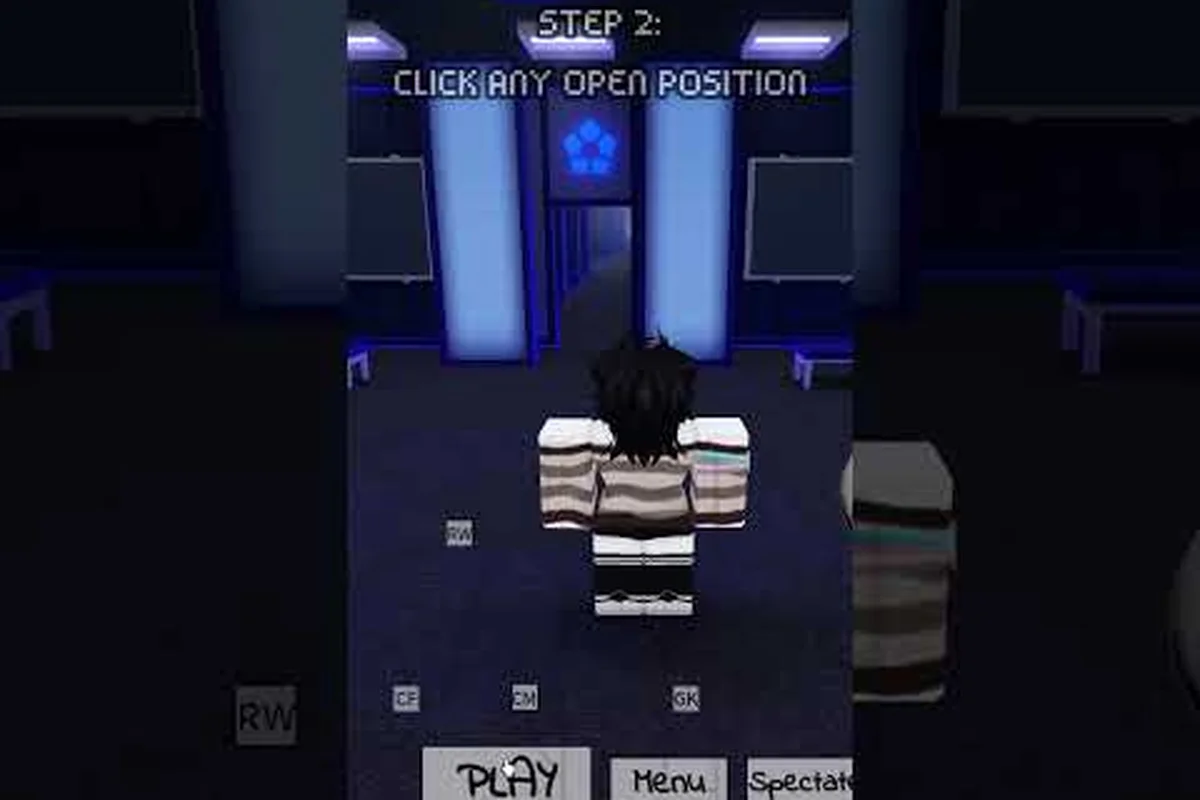
This Azure Latch guide walks through the parts of the game that actually decide matches: the six-minute clock and the 30-second intermission, the five-skill cooldown loop every Style shares, the Flow meter that unlocks your awakening, and the two currencies that fund your next Style roll. It sticks to what the developer has published, so you can use it as a reference without wading through mechanics the game does not have.
Your First Match Orientation
Every Azure Latch guide starts with the same foundation: matches run six minutes long with ten players per server, and the 30-second intermission before kickoff is where you lock in your position and Style. The intermission is the single most important window in the entire match, because once that timer hits zero, your position and Style choice are sealed until the next game. Players select between central forward, left wing, right wing, central midfielder, and goalkeeper, and every Style carries five numbered skills, one T special, and a Flow awakening — all gated by cooldowns rather than a stamina bar.
Understanding that cooldown-driven system separates newcomers from intermediate players. Unlike stamina-based sports games, Azure Latch rewards players who manage the Cooldown Cycle of their Style, rotating their strongest abilities around the timer instead of dumping everything in the opening minute. Getting that rhythm right is the backbone of the game's skill ceiling.
By the time you've cleared your first ten Azure Latch matches, the match structure — a 30-second intermission followed by six minutes of continuous play, with only a short respawn delay whenever a player goes down — should feel automatic. Every Style in the game shares that same ten-player, six-minute skeleton, and the players who improve fastest are the ones who stop thinking about the clock and start instinctively mapping their five-skill rotation, T special, and Flow awakening onto each phase of the match without consciously reading it.
| Phase | Duration | What Happens |
|---|---|---|
| Intermission | 30 seconds | Lock position + Style |
| Match clock | 6 minutes | Continuous play from kickoff to the final whistle |
| Respawn delay | About 3 seconds | Return to the pitch after being knocked down |
| Overtime | Added time | Reached only when the score is level at 0:00 |
Every Style in the game has the same skeleton: five skills numbered 1 through 5, one T special mapped to the T key (or the dedicated T button on mobile), and one Flow awakening that triggers when your Flow meter maxes out. The art of the game is learning how each Style's skeleton plays differently when you start chaining those pieces together.
The Five-Skill Cooldown Loop
The numbered skills (1 through 5) on every Style aren't just attacks — they're the building blocks of your entire offensive or defensive identity. Many players never get full use out of skills 1 and 2 because they save them for "perfect moments" that never come. The habit worth building is to use your low-numbered skills as cooldown fillers, then layer your high-numbered skills (4 and 5) into position-aware combos when the defender commits.
That advice applies whether you're playing striker, midfielder, or wing. The pattern repeats across roles: lower numbers = frequent use, higher numbers = setup pieces. Your T special is your highest-impact button, but it has the longest cooldown, so it has to be timed to either a defensive collapse or a clean breakaway. Flow Awakening is the trump card layered on top, because it buffs your T special or your strongest skill for a short window once the meter fills.
What Fills the Flow Meter
Flow fills through a fixed set of actions, and the game publishes exactly what each one is worth. Winning the ball is the biggest repeatable earner, scoring is the single largest gain, and the small bonuses for catches, saves and headers reward keepers and defenders for doing their basic job. Here's how the rate compares:
| Action | Flow Gained | Notes |
|---|---|---|
| Goal scored | 15% | The largest single gain in the game |
| Tackle or interception | 12% | The best repeatable source for defensive players |
| Successful dribble | 10% | Rewards beating a defender with the ball |
| Catch or save | 2% | The goalkeeper's steady trickle |
| Header | 2% | Small, but it stacks over a match |
Notice that a goal is worth 15% on its own while a shot that misses is worth nothing at all, so the meter rewards finishing rather than volume. A tackle or interception is worth 12%, which makes winning the ball the most reliable way for a defensive player to charge the gauge, and a successful dribble adds 10% on top of the ground you gain. Catches, saves and headers each add just 2%, so the goalkeeper builds Flow slowly and steadily rather than in bursts.
The Awakening Window
Once your meter is full you can spend it with the G key to trigger your Flow Awakening, the cutscene move that temporarily powers up your kit. Because the awakening is your strongest tool, the timing matters more than the raw charge: firing it the moment the meter fills, with nobody around you, wastes the whole gauge, so it is usually worth holding for a moment when the defence is committed.
Match-Day Strategy and the Intermission Read
Most players treat the 30-second intermission like a loading screen, but it's actually a small decision tree. Reading your team's Style picks before kickoff lets you predict whether you'll be playing possession football or counter-attacking football. If three teammates lock in passing-heavy Styles, you know to bring a finishing Style into the forward slot. If your squad leans defensive, you know to bring a forward Style that can generate shots without much help.
That pre-match read matters more than any individual skill execution, because a Style locked in at kickoff can't be swapped until the final whistle — meaning a bad pick in Azure Latch's intermission lobby bleeds value across the full 6-minute match. The framework worth using is simple: look at the Styles your teammates have already taken, then fill the gap they leave rather than doubling up on a strength the squad already has.
-
Count your Style types: passing vs. shooting vs. defending — adjust your pick to balance the squad.
-
Watch the enemy first: if you see three forwards on the other side, lock a central midfielder who can hold the middle.
-
Pick for the early game: your Style is locked for the full match, so choose for the conditions you'll face in the first two minutes, not the last.
-
Match the Style to the space: some Styles work best in tight central areas and others need room to run, so pick one that fits where you expect to play.
This kind of strategic pick is one of the clearest things you can do to raise your win rate. Competitive play and organised scrims are discussed further in the community's Azure Latch competitive notes, which cover role-by-role decisions in more depth.
Techs That Win Games: Volleying, Air Dribbles, and Curving
The tech ceiling in Azure Latch lives in three specific mechanics: volleying, air dribbling, and the curve shot. Each one is a multi-input combo that, once mastered, lets you score from positions where most players would settle for a pass.
The Volley
A volley is a first-touch shot out of the air, with no dribble setup, and the input has to land in a very short window as the ball drops. That narrow timing is why most players miss their first attempts. The input sequence is simple — once you internalize the timing:
-
Position your striker under the dropping ball.
-
Hold the shoot input the moment the ball touches the apex of the bounce.
-
Tap the direction toward the far post at the same instant.
-
Release the shoot input as the ball makes contact with your foot.
The risk is that mistimed volleys fly well over the crossbar, but the reward is a shot the goalkeeper can't read because there's no wind-up animation. Pairing a volley with a T special released during your awakening gives you the strongest long-range option the game offers.
The Air Dribble
Air dribbling is the most expressive skill in Azure Latch. It lets a single attacker carry the ball from midfield into the box without ever touching the ground, which forces defenders into panic tackles. The full walkthrough, including the pop-boost-recontact pattern, lives in the Azure Latch air dribble walkthrough, but the core rhythm is short: pop the ball up, boost to meet it, tap to recontact, repeat. Mastering this gives you a one-versus-three escape route that no defensive Style can shut down without coordinated Flow usage.
The Curve Shot
The curve shot bends the ball around a wall or a defender's body by holding a direction while shooting. The deeper mechanics — iframes, parry windows, and counter reads — are covered in the Azure Latch curve shot guide, which walks through the full skill move list around the curve. The key insight is that curve shots work best when the goalkeeper is off their line, because the bend only matters if the keeper would have otherwise had a clean read on the shot.
Your First Week of Matches
The simplest way to warm up is to spend a few games in a public server before you touch Ranked. Public matches cost you nothing but time, so you can use them to check that your inputs are landing, re-learn the cooldown rhythm of your main Style, and get your Flow timing back before you queue somewhere the result matters. Treating those games as a warm-up rather than pretending every one of them is a final is what keeps a session from turning into a tilt spiral.
It helps to keep a short note of what you tested in each warm-up game, because a public match is the cheapest place to find out that a particular skill-to-skill chain keeps dropping or that your aim on the move is off. Once your inputs are landing cleanly and your Flow cycle feels automatic again, you have done the job the warm-up was there to do, and Ranked is a reasonable place to be.
| Warm-up game | What to check | Style | Focus |
|---|---|---|---|
| 1 | Inputs and connection feel stable | Any | Basic movement and shooting |
| 2 | Skill buttons land on time | Main Style | Skills 1 and 2 |
| 3 | A single skill's timing | Main Style | Skill 3 in isolation |
| 4 | A short combo chain | Main Style | Skill 4 into skill 5 |
| 5 | Full Flow cycle | Main Style | Charging and spending the awakening |
The crucial detail: every match should be on the same Style. Switching Styles between warm-up games is the fastest way to develop bad muscle memory, because the cooldown windows and animation timings differ across the roster. Pick your main Style, lock it in, and learn its rhythm.
Where Progress Comes From: Mastery, Cash and Style Coins
Progression in Azure Latch splits into three parallel tracks: Mastery, Cash, and Style Coins. Mastery is the long game that evolves a specific Style through questlines, Cash is the everyday currency you earn from ordinary play, and Style Coins are what you spend to roll new Styles. Balancing all three is what keeps a roster growing instead of stalling.
Mastery Track
Mastery in Azure Latch is not an XP bar you fill by playing. It is a set of multi-stage questlines, and finishing one permanently unlocks an evolved version of a specific Style. The evolved Styles the developer has published include Mastery Michael Kaiser, Mastery Oliver Aiku, Mastery Don Lorenzo, Yo Hiori, and NEL Isagi Yoichi. Because these come from objectives rather than from the shop, the reward is worth the time: you end up owning a Style that no amount of rolling can produce.
Cash Track
Cash is the everyday currency. You earn it from match payouts — a win pays 100, a goal 50, an assist 30, a steal 20 and an ankle break 20, with a loss paying nothing — and the idle chamber trickles it in while you are away. Cash converts into Style Coins at a fixed 5:1 rate, so every 5,000 Cash you stockpile is worth 1,000 Style Coins. For the full breakdown of what pays out and when, the Azure Latch currency hub maps every Cash source.
Style Coin Track
Style Coins are the currency used to roll new Styles, and a single roll costs 250 Style Coins. Pulling a Style you already own refunds roughly a tenth of that cost, so duplicates are not a total loss. There is also a Spin Pity system that improves your odds across repeated pulls, and it does not stack with the Luck booster, which means the two bonuses are alternatives rather than multipliers.
| Track | What it is | Where it comes from | What it unlocks |
|---|---|---|---|
| Mastery | Multi-stage questlines | Quest objectives | Evolved Styles such as Mastery Kaiser |
| Cash | Everyday currency | Match payouts and the idle chamber | Emotes, titles, MVP animations, conversions |
| Style Coins | Roll currency | 5:1 conversion from Cash, codes, idle chamber | New Styles at 250 coins per roll |
The smartest progression path runs all three in parallel: you play matches to earn Cash, you work a mastery questline in the background, and you convert spare Cash into Style Coins for future rolls. This loop compounds over time, and it is the same loop organised guilds use to keep their rosters growing without spending Robux.
Common Mistakes That Stall Progress
Even with a solid warm-up routine and a balanced progression loop, a few recurring mistakes keep players from improving. Each habit below is a symptom of how the Flow gauge, the cooldown loop, and the Style Coin economy actually behave in a real match — not how they look on paper. The most common ones:
-
Saving T Special for "the perfect moment": the perfect moment rarely comes. Use T to create pressure, not to react to it.
-
Ignoring Flow cycling: holding 100% Flow without Awakening means you're playing without your strongest tool.
-
Picking a Style that doesn't match the squad: locking a third striker when your team already has two is a guaranteed loss.
-
Skipping the intermission read: queueing in without checking your squad's Style picks throws away free strategic information.
-
Spending Style Coins the moment you earn them: holding the minimum 250 for a roll is fine, but dumping every coin the second you have it leaves nothing banked for a Style you actually want.
-
Not playing defense: even forwards need to track back during counter-attacks, because a tackle or interception is worth 12% of your Flow meter.
Each of these mistakes is a habit, and habits are fixable with deliberate practice — but only if you isolate them one at a time rather than trying to rework your entire playstyle at once. The warm-up games above are a low-pressure place to break a habit before it costs you in Ranked, and it works best if each session targets a single failure point: one night you deliberately spend an early T special to feel the cooldown cost, the next you practice holding your Flow until you are actually in a dangerous position. Keep a one-line note of what you focused on, and after a few sessions the pattern usually shows whether your biggest leak is gauge management, positioning, or defensive tracking.
Pulling It All Together
The full Azure Latch walkthrough comes down to a few interconnected systems: the cooldown-driven Style loop, the Flow-to-Awakening cycle, the intermission read, and the parallel progression tracks. Once you internalize each piece, the game opens up — you start seeing combos you couldn't execute before, you read defenders' Flow timers, and you predict squad compositions before kickoff.
A clean weekly cycle looks like this: warm up with a few public matches on your main Style, move into Ranked when your inputs feel sharp, keep one mastery questline running in the background, and bank Style Coins toward your next roll. That routine, repeated over a season, is what turns a beginner into a player with a fully evolved main Style and a small roster of backups. The rest is just reps.
Frequently Asked Questions
What is the best Style for beginners in Azure Latch?
The best beginner Style is one whose five moves you can actually remember while you are learning to play. The two Common Styles every player starts near — Isagi Yoichi and Gagamaru Gin — are the natural first picks, because they are the cheapest to roll and forgiving to learn on. Play a few matches on a Style before judging it; the cooldowns only start to feel automatic after you have used it a few times.
Does Azure Latch publish a visible rating number?
No. Ranked does not show a public rating or division figure — the developer's published information describes only a Bronze-based ladder, and Ranked itself unlocks at 500 goals or 250 saves. What the game does provide is the Rows leaderboard, guilds, and seasonal rewards in the form of exclusive MVP animations and titles rather than a currency payout.
Should I buy the VIP Gamepass as a new player?
Not before you have a main Style you actually enjoy playing. The game has twelve gamepasses, and VIP is just one of them — none of them are required to progress, because Cash and Style Coins both come from ordinary play. Once you know which Style you want to main, the cosmetic and quality-of-life passes start to look more worthwhile than they do on day one.
How do I practice volleys without ruining my ranked games?
Practice volleys in public servers rather than in Ranked, where a missed attempt costs you nothing but time. Set yourself a target of a few attempts per match, and don't worry about conversion rate until you can reliably connect with the timing window.
Can I switch Styles mid-match?
No, Style is locked for the full six-minute match. The only swap point is the next intermission, which is why reading the squad composition before locking in matters so much — your Style choice shapes everything you do for the next six minutes.