
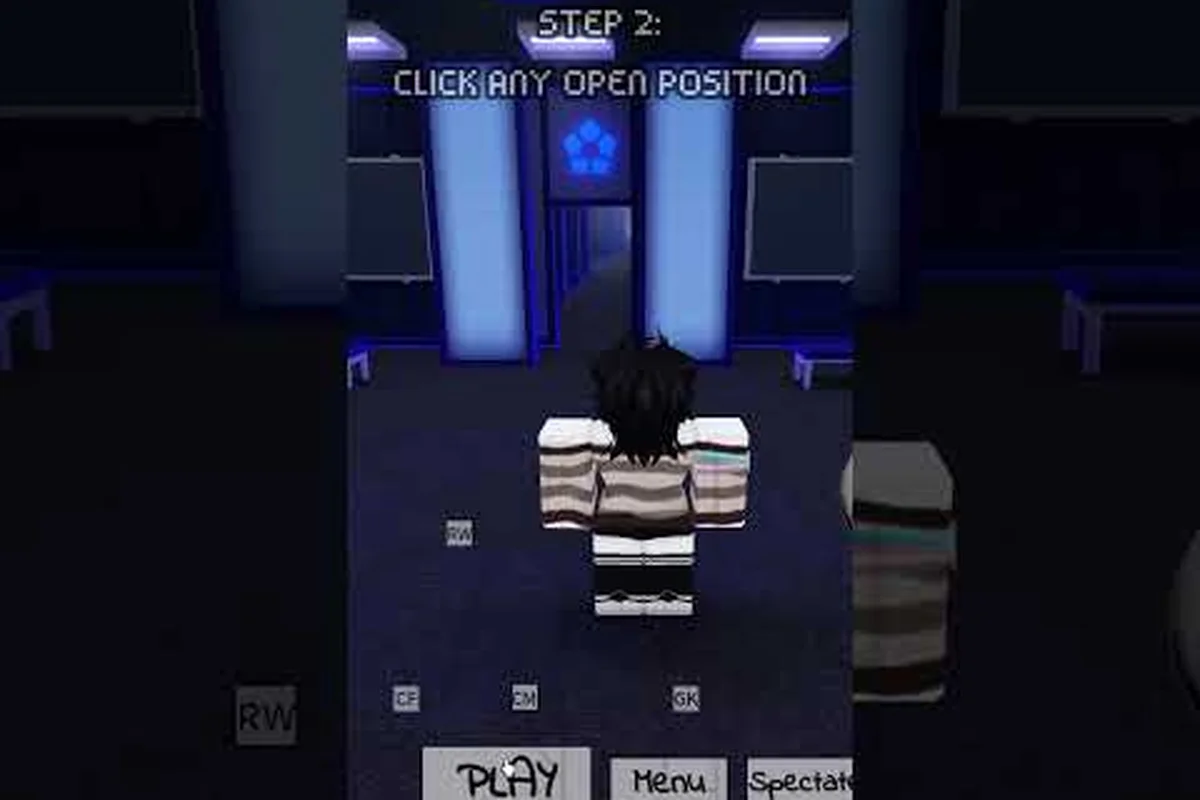
This Azure Latch beginner guide walks through the whole opening loop: what a six-minute match actually looks like, how the 30-second intermission works, which position to pick first, and how the Style and Flow systems fit together. Everything below follows the game's own published information rather than guesswork, so you can start playing without chasing mechanics that are not part of the game.
Getting Your Bearings in Azure Latch
Stepping into your first match of Azure Latch can feel disorienting because the game skips the long tutorial that most Roblox sports titles lean on. The lobby loads, the intermission clock starts, and suddenly you are picking a position, a Style, and a role in a system that uses anime-inspired abilities instead of stamina bars. A solid Azure Latch beginner guide has to address that cold-start problem first, because the player who walks in without a plan usually spends the first two matches sprinting in circles before the ball ever reaches them.
A match runs 6 minutes with 10 players per server, and the 30-second intermission is when every player locks a position, a Style, and the role they want to play. Once the whistle blows, cooldowns replace stamina, which means energy management is about timing rather than recovery, and positioning is about reading the field rather than chasing the ball blindly. Those two design choices are the foundation of every tip that follows.
This starter guide is built to get a brand-new player from "I have no idea what is happening" to "I am contributing to my team's scoreboard" in roughly three or four matches. We will walk through the match format, the five core positions, the Style system, the flow-to-awakening loop, and a practical first-session routine. Players who already feel comfortable with the controls can jump straight to the flow-state section, but the Azure Latch combo guide is worth bookmarking for later once you start chaining skills.
Understanding the Match Format and Intermission
Every Azure Latch match follows the same skeleton, and learning that skeleton is the single fastest way to stop feeling lost. The format is short and repeatable, which is intentional: the developers want players cycling back into matches quickly so that muscle memory compounds. If you understand the intermission, the match clock, and the scoring rules, you can predict what your teammates should be doing even before you understand the abilities on your own bar.
The 6-Minute Match Clock
A match lasts exactly 6 minutes of active play on a single running clock. When a goal is scored or a player goes down, play simply resumes rather than stopping for a long reset, and a goal never ends the match, so a trailing team always has a path back into the game. The clock is long enough to allow comebacks but short enough that wasting the first minute leaves little time to recover, which is why a tight opener matters. Because the respawn delay is only a few seconds, an early concession never means the game is over, so pressing hard in the opening minute is a reasonable way to set the tempo.
| Phase | Duration | What Happens |
|---|---|---|
| Intermission | 30 seconds | Lock position, Style, and role |
| Match clock | 6 minutes | Continuous play; goals do not stop the clock |
| Respawn | About 3 seconds | Return to your position after being knocked down |
| Match End | — | Stats shown, rematch prompt |
The 30-Second Intermission Is Where Matches Are Won
Most beginners spend the intermission scrolling through Styles or wandering around the lobby, but the top players treat those 30 seconds as a planning phase. You need to confirm your position, your Style, and your role, and you need to glance at what your teammates picked so the team composition makes sense. Picking three central midfielders and leaving the back uncovered technically works, but it invites a defensive collapse, so reading teammates is part of the meta. A quick pre-match checklist worth committing to memory:
-
Position locked first, because Style choice depends on whether you are playing forward, winger, midfielder, or goalkeeper
-
Style picked second, matching the role you intend to play in the next 6 minutes
-
Teammate glance third, just enough to confirm you are not stacking the same position five times
-
Cooldown awareness remembered, because no Style uses a stamina bar, only timed cooldowns
Once that checklist becomes muscle memory, the 30-second window feels comfortable rather than rushed, and you can spend the rest of the intermission mentally rehearsing your opening move. A standard match runs six minutes with a thirty-second intermission in a ten-player server.
Choosing Your Position: The Five Core Roles
Azure Latch gives every player five positions to choose from, and each one changes both your responsibilities and the parts of the field you will spend the most time on. Beginners often pick a position based on what looks cool, but a smarter first-session approach is to pick based on what you enjoy doing in real-life soccer or anime-style team games. The game rewards role specialization, so playing a smaller number of positions well beats switching every match.
| Position | Primary Zone | Main Job | Best For Beginners? |
|---|---|---|---|
| Central Forward | Opponent's box | Finish scoring chances | Yes, if you like goals |
| Left Wing | Left sideline | Stretch defense, cross | Medium, needs pace |
| Right Wing | Right sideline | Mirror left wing duties | Medium, needs pace |
| Central Midfielder | Center of pitch | Link defense and attack | Best default pick |
| Goalkeeper | Own box | Block shots, distribute | Hardest, save last |
Central Midfielder: The Safest First Pick
For most new players, Central Midfielder is the best starting position because it gives you a view of the entire pitch and lets you contribute to both defense and attack without specializing. A midfielder who passes cleanly, tracks back on defense, and occasionally pushes forward already covers three of the five most important team behaviors, and the position forgives positional mistakes better than the wings. Because it touches the ball in every phase of play, it is also the position where a beginner learns the most in the fewest matches.
Goalkeeper: A Role to Earn, Not Grab
Goalkeeper in Azure Latch is not a passive role. You are actively blocking shots using the dive button, distributing the ball after saves, and communicating defensive shape with the players in front of you. New players who pick goalkeeper on their first match tend to leak goals, and a 6-0 first game is demoralizing enough to push someone out of the queue. A sensible path is to spend your first few matches in midfield or forward, learn how shots are angled and how crosses curve, and then swap to goalkeeper once you understand the offensive toolkit. If you want to dive straight into the role, watching how the dive and distribution buttons work in a public server is a useful first step.
The Style System: Five Skills, One T, One Flow
Every Style in Azure Latch is a self-contained kit with the same internal structure: five numbered skills, one T special, and one Flow awakening. That consistency is one of Azure Latch's best design choices for beginners, because once you learn how one Style's cooldown windows work, you can transfer that knowledge to any new Style you pick up. The game replaces the traditional stamina bar with cooldowns, so the mental model is closer to a MOBA than to a typical Roblox sports game.
Numbered Skills 1 Through 5
The five numbered skills are your bread-and-butter actions: passes, shots, dribbles, tackles, blocks, and supporting abilities depending on the Style. Each skill has its own cooldown, which is the time you must wait before triggering it again. Beginners often mash every skill at once and end up on full cooldown with nothing to do, which is why the first habit to build is reading the cooldown ring on each skill icon before committing to the next button.
The T Special: A High-Impact, Long-Cooldown Ability
The T special is the named ultimate that most players save for clear scoring chances, last-ditch tackles, or set-piece moments. It carries a long cooldown, often stretching across a large part of the match, so wasting it on a half-chance is one of the most common beginner mistakes. The recommended use is to hold the T special until you can read the play one step ahead, which is a skill that takes a few matches to develop.
Flow Awakening: The Reward for Sustained Pressure
Flow is Azure Latch's version of a hype state, and it is the mechanic that most strongly rewards players who understand the flow-to-awakening loop. The meter fills from concrete actions: a tackle or interception adds 12%, a successful dribble adds 10%, a goal adds 15%, and a catch, save or header adds 2% each. At full charge you can spend it with the G key to unlock your Flow awakening, a temporary power spike that can flip a match on its own. Beginners often ignore Flow entirely and wonder why their Style feels weaker than expected, so make a habit of glancing at the meter between plays.
| Style Element | Count | Cooldown Feel | Best Practice |
|---|---|---|---|
| Numbered skills | 5 | Short to medium | Chain 2-3 in sequence, then wait |
| T special | 1 | Long | Hold for clear moments |
| Flow awakening | 1 | Meter-based | Build through role-appropriate actions |
Building the Flow-to-Awakening Loop
The flow-to-awakening loop is the single most important habit a beginner can develop, because it is what turns a Style from a list of buttons into a coherent playstyle. The loop is simple in concept — do the actions your Style rewards, fill the meter, unleash the awakening — but it requires you to play your role rather than chasing the ball everywhere. Players who ignore the loop spend whole matches without ever reaching the awakening and wonder why their Style feels underwhelming.
Step 1: Pick Actions That Match Your Role
Each Style is tuned to reward a specific kind of contribution, and the loop only works if you perform those contributions. The strongest single gain is a goal at 15%, while a tackle or interception is worth 12% and a successful dribble 10%, so the reliable route is to keep doing the defensive and dribbling work your position already asks for. Chasing shots that miss adds nothing to the meter, which is why holding the ball and waiting for a clean look beats firing at will.
Step 2: Chain Three to Four Actions in a Row
Flow rewards consistency, so a quick burst of three or four matching actions fills the meter faster than sporadic play. A short sequence of numbered skills fired off in order, with cooldowns overlapping, creates pressure that the opponent cannot respond to cleanly. If you want a deeper dive on chaining, the Azure Latch combo guide covers keybinds and advanced tech in detail.
Step 3: Unleash the Flow Awakening at the Right Moment
The Flow awakening is wasted if used the instant the meter fills, because opponents can still respond. The recommended pattern is to hold the awakening for a moment when two or more opponents are committed out of position, which is the same one-step-ahead thinking that applies to the T special. A well-timed awakening often scores directly, but a poorly timed one trades a full Flow bar for a wasted cooldown, which is why restraint matters more than reflex.
Pre-Match Routine for Your First Five Matches
A repeatable pre-match routine removes the cognitive load of "what do I do now" and replaces it with a checklist you can run on autopilot. For your first five matches, the goal is not to climb ranks or carry games, but to build the muscle memory of intermission, role, Style, and Flow. After five matches you should know your favorite position, your favorite Style, and the timing of your awakening, and that is the point at which you can start optimizing for score impact.
| Match # | Goal | Position to Try | Style to Test |
|---|---|---|---|
| 1 | Learn the pitch | Central Midfielder | All-rounder |
| 2 | Try a winger role | Left Wing | Wide play |
| 3 | Take a shot | Central Forward | Shooting |
| 4 | Try the opposite flank | Right Wing | Wide play |
| 5 | Save a shot | Goalkeeper | Defensive |
Common First-Session Mistakes to Avoid
-
Mashing every skill at once — leaves you on full cooldown with nothing to do
-
Ignoring the Flow meter — you lose the awakening, the strongest moment in any Style
-
Picking goalkeeper on match one — leaks goals and frustrates both you and your team
-
Switching Style every intermission — prevents you from learning any kit deeply
-
Chasing the ball into a crowd — takes you out of position and leaves the pass you should have been making unplayed
If you have already fallen into one of these traps, the Azure Latch beginner mistakes guide is a useful follow-up once you finish your first five matches. The mistakes list is short because Azure Latch is forgiving, but every entry on it costs you a goal or two per match, which compounds fast.
Progression Beyond the First Five Matches
Once you have five matches under your belt, the question shifts from "how do I play" to "how do I get better." Progression in Azure Latch is not gated behind a heavy grind, but it does reward players who build a small set of habits: mastering two Styles instead of sampling ten, learning one winger pattern and one central pattern, and playing enough matches to read opponent Flow timings. At that point the match starts to feel slower, because you can predict what is about to happen before it does.
Building a Two-Style Roster
Most intermediate players run two Styles: a primary kit for their main position and a secondary kit for when the team needs flexibility. Beginners who try to learn six Styles in their first 20 matches end up mediocre at all of them, while players who learn two Styles deeply can swap between them with confidence. The recommended order is to master your first Style fully, including its T special and Flow timing, and only then add a second Style to the rotation.
Reading Opponent Flow Timings
After roughly 10 to 15 matches, you will start noticing that strong players fill their Flow meters on a predictable beat. Once you can spot the moment a high-skill opponent is about to awaken, you can back off, give up the space, and wait out the awakening rather than engaging at full disadvantage. This kind of pattern-reading is the natural next step after you have mastered the basics. If you want more on how Flow timing plays out against organised opponents, the community's Azure Latch competitive notes discuss the subject without assuming a published rating system exists.
Playing With Friends for Faster Learning
Azure Latch supports small-group play, and a duo or trio of beginners who queue together will learn faster than solo players, because you can call out cooldowns, Flow timings, and defensive shape in real time. The Azure Latch how to play with friends guide covers party setup, but the short version is that queuing with two or three friends makes it easier to communicate, which speeds up the learning process.
Frequently Asked Questions
What is the best position for a brand-new Azure Latch beginner?
Central Midfielder is the safest first pick because it puts you in the center of the pitch, where you can see the whole field and contribute on both defense and attack. You can swap to forward, winger, or goalkeeper once you understand how the other roles are played, and you will not leak goals while you are still learning the controls.
How long is a single Azure Latch match?
Every match runs 6 minutes of active play on one continuous clock, with only the 30-second intermission before kickoff to prepare. The intermission is also when you lock your position and Style, so plan ahead during the lobby countdown rather than scrolling menus while the whistle is about to blow.
How do I fill the Flow meter faster?
Perform the actions the game actually rewards: a tackle or interception adds 12% to the meter, a successful dribble 10%, and a goal 15%, while catches, saves and headers add 2% each. Chaining three to four of those actions in a row fills the meter faster than sporadic play, and a quick glance at the meter between plays keeps you aware of how close you are to the awakening.
Should beginners play goalkeeper first?
No, goalkeeper is the hardest role to learn cold because you are facing the strongest offensive Styles without the muscle memory to read shot angles yet. Spend your first 5 to 10 matches in midfield or forward, learn how attacks are built, and then swap to goalkeeper once you understand the offensive toolkit you will be facing.
Can I change Style mid-match?
No, Style is locked during the intermission and cannot be swapped until the next match, which is why the pre-match checklist matters. Pick a Style that matches your intended role, commit to it for the full 6 minutes, and treat the next intermission as your chance to swap only if the first match clearly proved the kit does not fit your playstyle.